On Eventer, filters decorate your event’s photos: a frame, a logo or the couple’s names are overlaid on every photo taken with the camera and the photobooth. There are two ways to personalize them: the Personalized Filter, created directly in the app, and the Pro Filters option, which lets you import your own PNG visuals for a fully custom result. (To tell the two apart, see Personalized Filter / Pro Filters: which one to choose?.)
Pro Filters offers total creative freedom… but until now it required mastering a design tool or hiring a graphic designer. Not anymore: with AI, anyone can generate a quality filter, with no graphic design skills at all. Here’s how, in two steps.
1. Generate the visual with ChatGPT
We use ChatGPT because it’s easily accessible and its graphic capabilities are good; any comparable generative-AI tool can also work. The prompts below were tested on ChatGPT 5.5 — results may vary depending on the version used.
The method comes down to two prompts to paste one after the other, in the same ChatGPT conversation. The first creates two beautiful source visuals — one portrait and one landscape — with a large central area left clear for faces. The second turns them into transparent PNGs at the right dimensions, ready for Eventer.
Two things need to be customized in this first prompt:
- The theme describes the mood and visual style you want — for example “rustic floral wedding”, “1980s neon birthday” or “elegant corporate seminar, blue and gold”.
- The text, kept short, is what will appear at the bottom of the filter: the event name or first names — for example “Marie & Paul”, “Julie’s 40th” or “Team Building 2026”.
Prompt 1 — the source visual (replace [REPLACE WITH THE THEME] and [REPLACE WITH THE TEXT]):
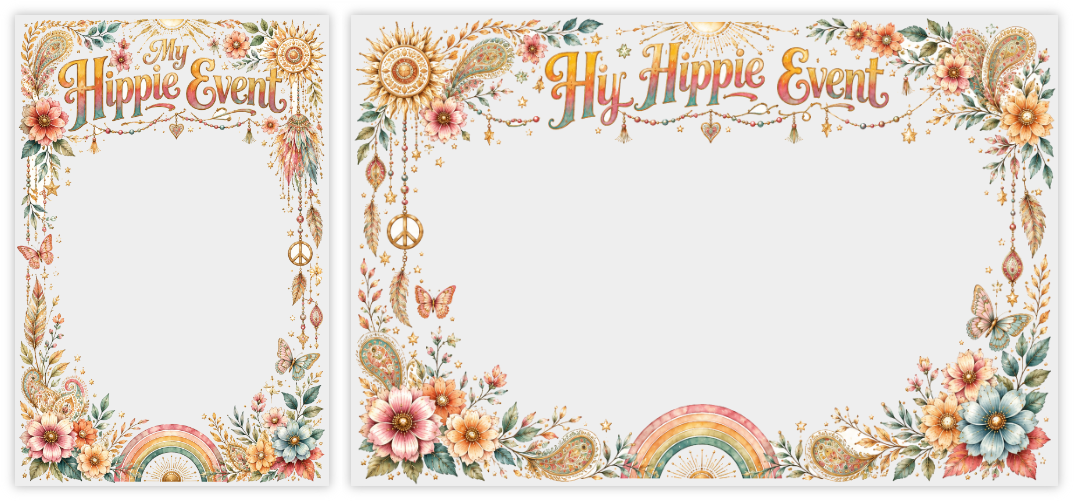
I want to create two source visuals for event photo filters.

THEME: [REPLACE WITH THE THEME]
EXACT TEXT: [REPLACE WITH THE TEXT]

I want 2 separate images:

1. a portrait version at 1080x1620
2. a landscape version at 1620x1080

IMPORTANT:
At this stage, I am not asking for the final transparency yet.
I am only asking you to create two very successful, aesthetic, high-end SOURCE VISUALS, which will then be cut out technically.

Visual objective:
Create two premium decorative photo frames, beautiful, rich, harmonious, usable for photos of people.

Expected style:
- premium illustration
- decorative, elegant, festive
- hand-drawn / illustrated / light watercolor / refined marker style
- fine details
- light textures
- clean outlines
- subtle small shadows
- beautiful composition
- harmonious and polished result

To absolutely avoid:
- clipart
- flat vector
- crude pictograms
- simplistic style
- childish design
- heavy solid color blocks
- advertising poster
- cheap result

Composition:
- create a real decorative frame
- visual elements concentrated on the edges, the corners, the top and the bottom
- keep a very large empty central area for the people being photographed
- the text must be large, beautiful, legible, placed at the bottom
- the text must not rise too high
- do not include any character
- do not include any photo
- do not put a full decor in the central area

Areas to keep very clear:
- portrait: leave free the approximate central area x=170..910 and y=330..1320
- landscape: leave free the approximate central area x=240..1380 and y=220..860

Working background:
- very light uniform background
- off-white or very light ivory
- no texture
- no pattern
- no checkerboard
- no gradient
- perfectly uniform background

The background must stay simple and uniform because it will be removed technically afterwards.
But the decorative visual must remain very beautiful, rich and premium.

Requested delivery:
- one portrait source image 1080x1620
- one landscape source image 1620x1080
Let ChatGPT produce this first result — it can take a few minutes. Once the two visuals are displayed, move on to the second prompt, in the same conversation and without re-uploading anything.
Prompt 2 — the final transparency:
You must now use THE TWO IMAGES YOU JUST GENERATED earlier in this same conversation.
- The first image generated earlier = portrait source
- The second image generated earlier = landscape source
ABSOLUTELY IMPORTANT:
- Do not regenerate any image
- Do not redraw anything
- Do not change the style
- Do not change the colors
- Do not change the text
- Do not change the composition
- Do not simplify anything
- Do not add anything
- Do not remove anything except the uniform working background
You must only perform a TECHNICAL PROCESSING with Python/Pillow on the two images already generated in this conversation to produce the final files with real transparency.
Final files to produce:
1. filter_[theme]_portrait_1080x1620_transparent.png
2. filter_[theme]_landscape_1620x1080_transparent.png
Mandatory constraints:
- final portrait: exactly 1080x1620
- final landscape: exactly 1620x1080
- PNG format
- RGBA mode
- real alpha transparency
Mandatory method:
- use the first image generated earlier as the portrait source
- use the second image generated earlier as the landscape source
- open these two images in RGBA with Python/Pillow
- remove only the uniform light background connected to the edges and the center
- do not blindly remove all white pixels
- preserve white flowers, light details, outlines, reflections and decorative elements
- keep the text as is
- keep the design entirely
- export the 2 final files as transparent PNG
Use a flood fill / connected background logic to remove only the connected background.
Recommended code:
from PIL import Image
import numpy as np
from collections import deque
def remove_connected_light_background(input_path, output_path, final_size):
img = Image.open(input_path).convert("RGBA")
img = img.resize(final_size, Image.LANCZOS)
arr = np.array(img)
rgb = arr[..., :3]
alpha = arr[..., 3]
h, w = alpha.shape
light = (
(rgb[..., 0] > 225) &
(rgb[..., 1] > 220) &
(rgb[..., 2] > 210)
)
visited = np.zeros((h, w), dtype=bool)
q = deque()
seeds = []
for x in range(w):
seeds.append((0, x))
seeds.append((h - 1, x))
for y in range(h):
seeds.append((y, 0))
seeds.append((y, w - 1))
seeds.append((h // 2, w // 2))
for y, x in seeds:
if light[y, x] and not visited[y, x]:
visited[y, x] = True
q.append((y, x))
while q:
y, x = q.popleft()
for ny, nx in ((y-1, x), (y+1, x), (y, x-1), (y, x+1)):
if 0 <= ny < h and 0 <= nx < w:
if not visited[ny, nx] and light[ny, nx]:
visited[ny, nx] = True
q.append((ny, nx))
alpha[visited] = 0
arr[..., 3] = alpha
result = Image.fromarray(arr, "RGBA")
result.save(output_path)
def verify(path, expected_size):
img = Image.open(path).convert("RGBA")
assert img.size == expected_size, f"Mauvaise taille : {img.size}"
alpha = np.array(img.getchannel("A"))
assert alpha.min() == 0, "Aucune vraie transparence détectée"
assert alpha[expected_size[1] // 2, expected_size[0] // 2] == 0, "Le centre n’est pas transparent"
transparent_ratio = (alpha == 0).sum() / alpha.size
assert transparent_ratio >= 0.55, f"Pas assez de transparence : {transparent_ratio:.2%}"
print(path, "OK", img.size, round(transparent_ratio * 100, 2), "% transparent")
Mandatory checks before answering:
- portrait = exactly 1080x1620
- landscape = exactly 1620x1080
- the 2 files are RGBA
- the center pixel has alpha = 0
- at least 55% of the image is fully transparent
- no visible light background in the central area
- no checkerboard drawn
Expected answer:
- do not show the source images
- do not show a preview
- do not regenerate the images
- answer only with the 2 final transparent PNG files and a short confirmation that the Python checks passed
If you cannot run Python/Pillow in this conversation, answer only:
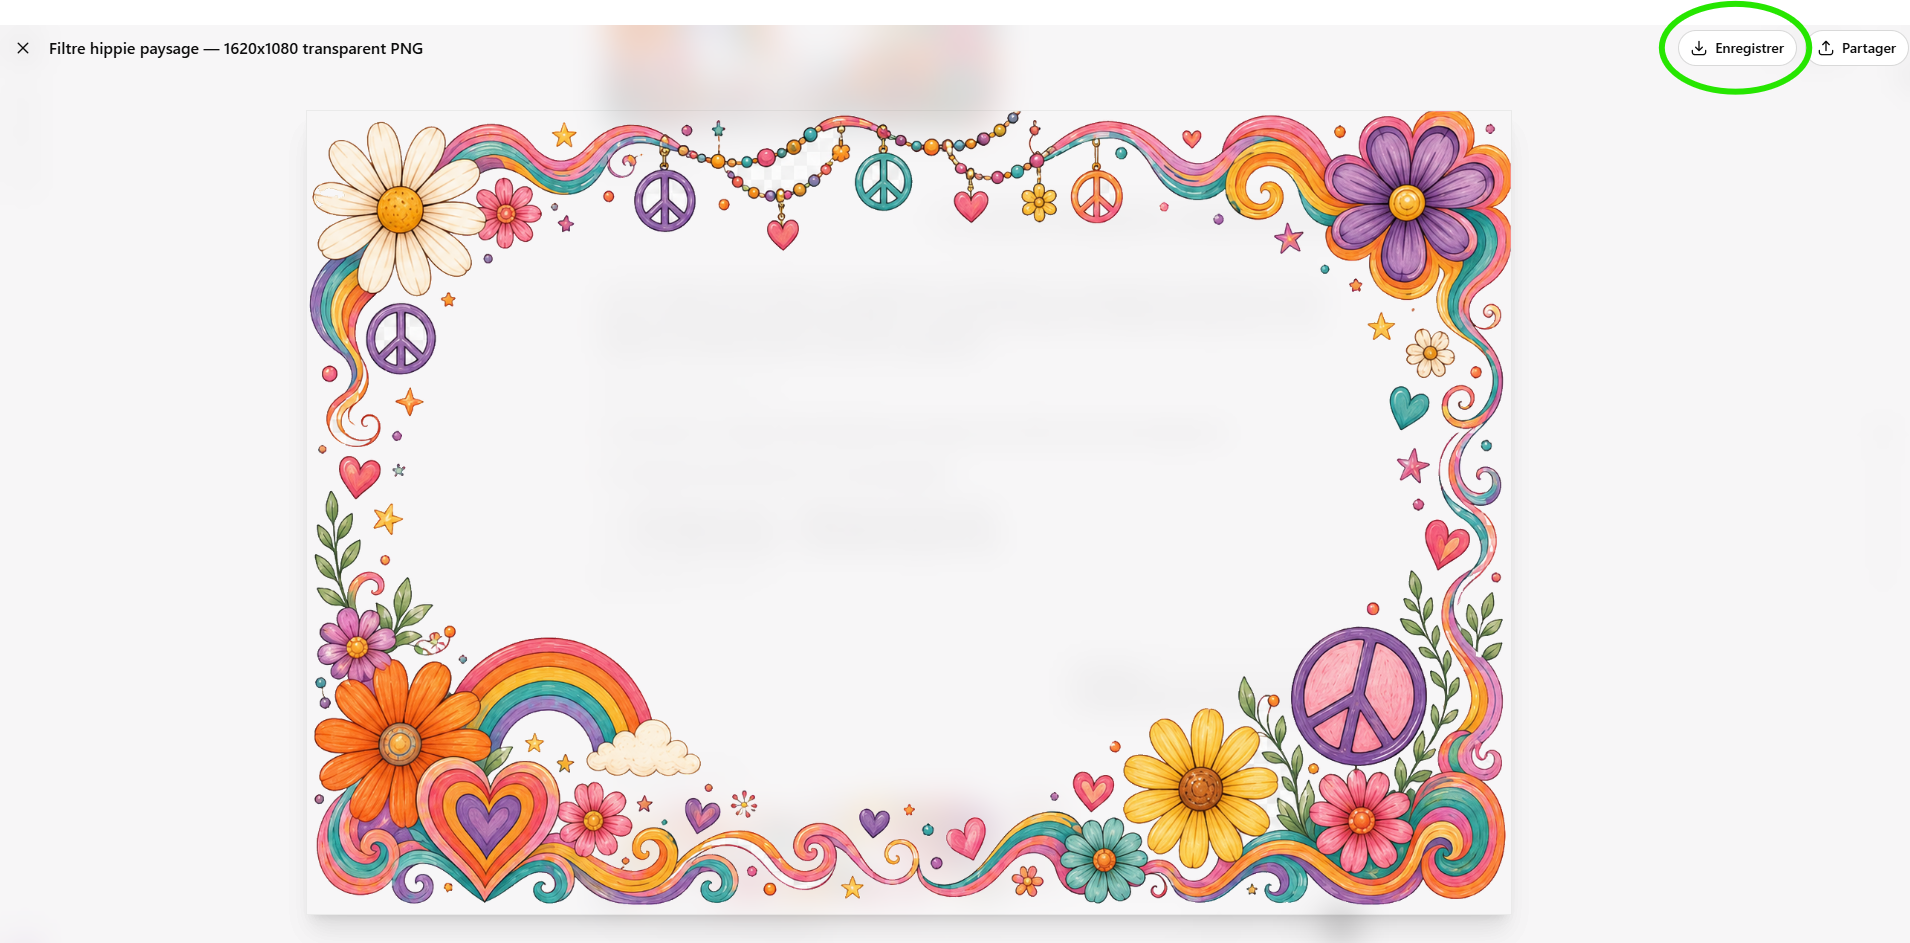
“I cannot guarantee real PNG transparency in this conversation.”You get two files: ..._portrait_1080x1620_transparent.png and ..._landscape_1620x1080_transparent.png.
At the end of the conversation, ChatGPT shows you the two final files to download:

Open each file then download it: you get your two transparent PNGs, ready to import into Eventer.
2. Integrate the filter into Eventer (Pro Filters option)
Once the Pro Filters option is enabled for your event, importing takes just a few clicks from a computer:
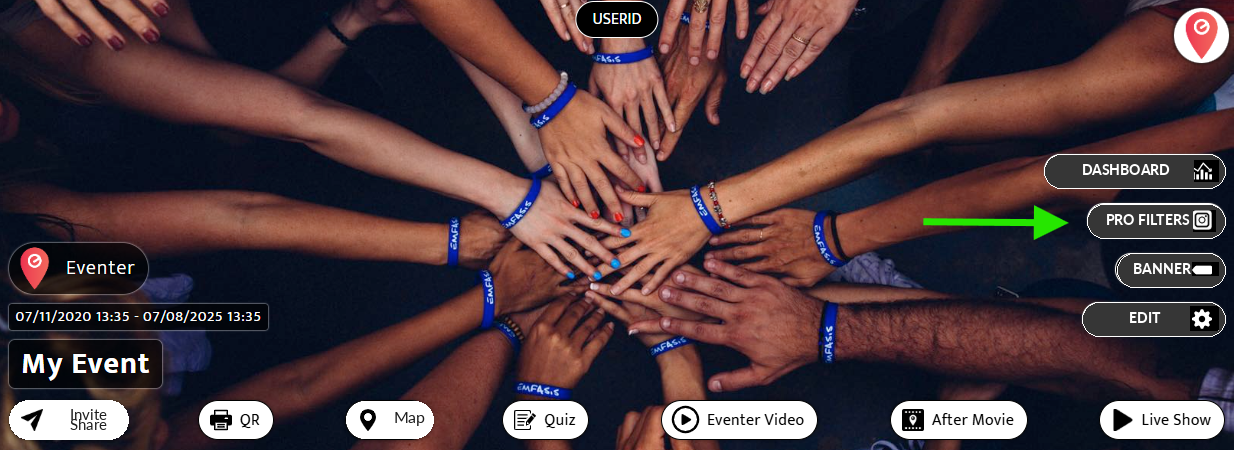
- Open your event on a computer via eventer.cc/web, then click the Pro Filters button, top right.
- Click + Add a filter.
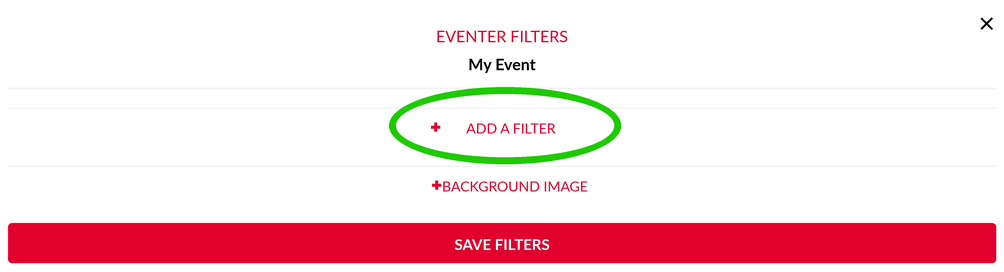
- Drop your portrait PNG (1080 × 1620) and your landscape PNG (1620 × 1080) into their respective zones.
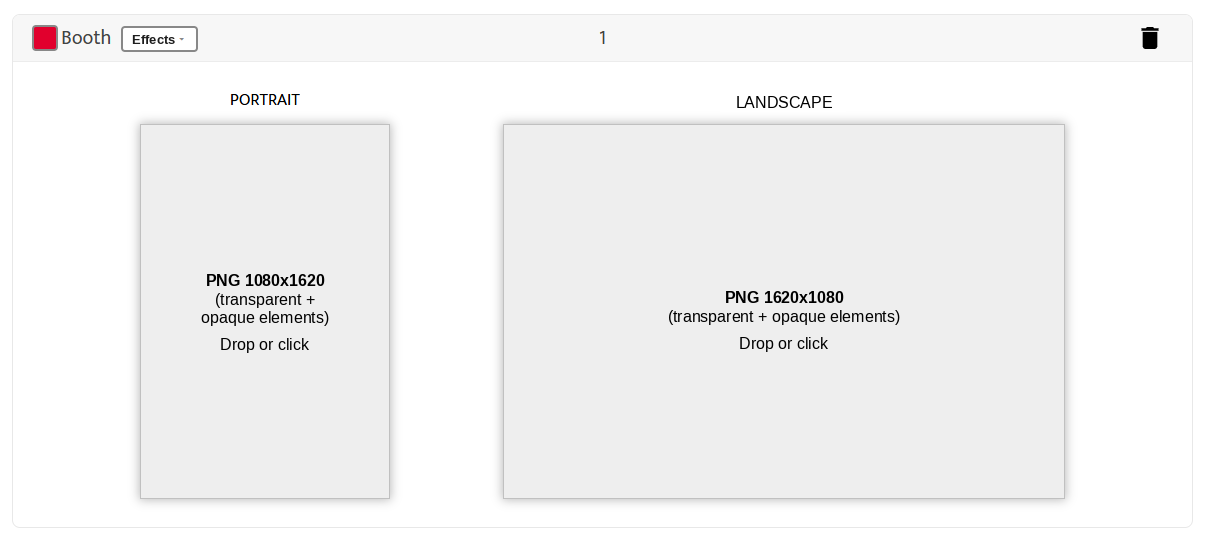
Once both PNGs are dropped in, a preview of your filter appears in each zone:

- Click Save filters.
That’s it: your AI filter will now apply to the photos taken with the camera and the photobooth.